This guide explains how to connect Microsoft Excel to your Xero accounting software using AccountingBi.
You can also watch the video (to be uploaded) - it gives a deeper insight into the process.
Excel Add-in, Excel Power Query, and a limited option for specific reports (Journals) through contacting AccountingBi support.
This method offers two options: working with a blank Excel file or using a pre-built template.
a. Blank File
Installing the Add-in: Individual users can install the AccountingBi add-in directly into your Excel desktop and Excel Web. Here’s how to:
Access the "Add-ins" section under the "Home" tab, select "+More Add-ins," search for "Accounting.bi," and install the add-in into your system.

If you're part of an organization, your Microsoft Admin will need to install the Accounting.bi Add-In and grant you access.
The process involves your administrator adding the add-in through the admin center and then individual users accessing it within their Excel application.
Active Subscription:
If you possess an active subscription to Accounting.BI then follow this third step. If not, then first set up your account in AccountingBi via this URL and take the Subscription with the given plans.
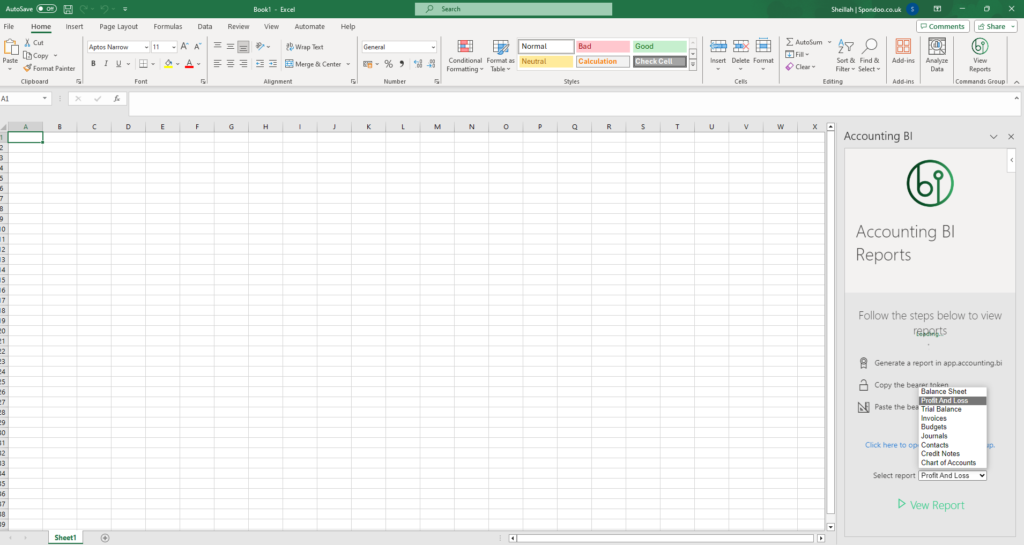
4.When you see the "Click here for bearer token popup", paste the bearer token, and save the changes. Then click on "View Reports" to display the report in Excel.

5.Viewing your Reports in Excel
b. Templates
Access the templates associated with the Excel add-in through the following URL: https://accounting.bi/template-dashboards/
Choose the template that best suits your needs & requirements then download it.
To integrate the Accounting.bi add-in into your Excel desktop and web versions, follow these steps:
Go to the "Home" tab in Excel, click on the "Add-ins", select "+More Add-ins," search for "Accounting.bi,". Locate the add-in and install it 0n your system.
If you belong to an organisation, the administrator for the Microsoft Admin Centre might need to install the Accounting.bi add-in and grant you access. Contact your IT department for assistance.
If you already have an active subscription accessible at https://app.accounting.bi/, proceed to step 5 (data verification).
If not then first set up your account in AccountingBi by given URL: https://accounting.bi/tips/how-to-link-your-account-and-setup-acountingbi and choose a subscription plan that meets your needs.
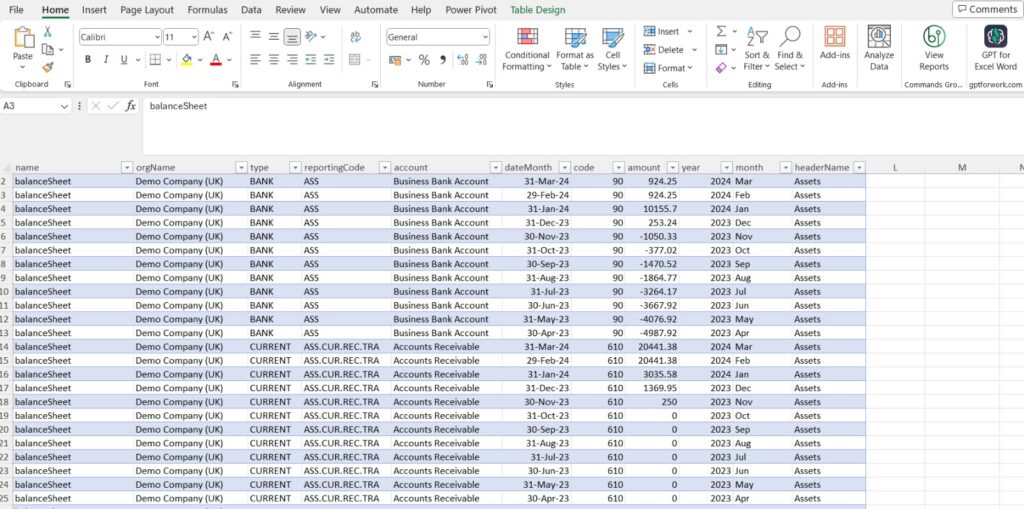
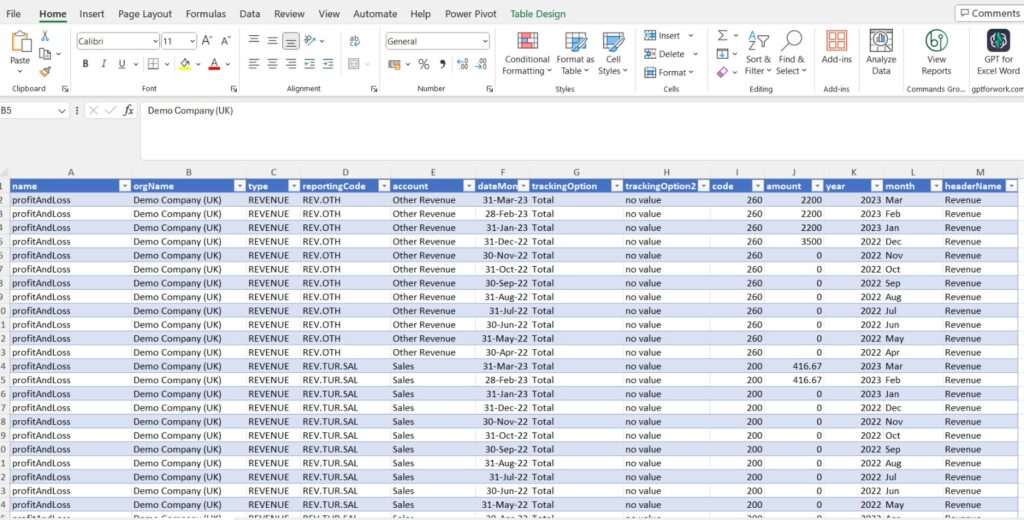
Now having downloaded your reports, installed the add-in, and set up your account, (if necessary), navigate to both the different endpoints: the Balance Sheet Reports and Profit and Loss reports sections to verify the accuracy of the retrieved data.
For further assistance, please contact our support team at: support@accounting.bi.
This method utilizes Excel's built-in Power Query tool to import Xero data from AccountingBi. There are two approaches:
a. Using a Blank File (for Profit and Loss & Balance Sheet):
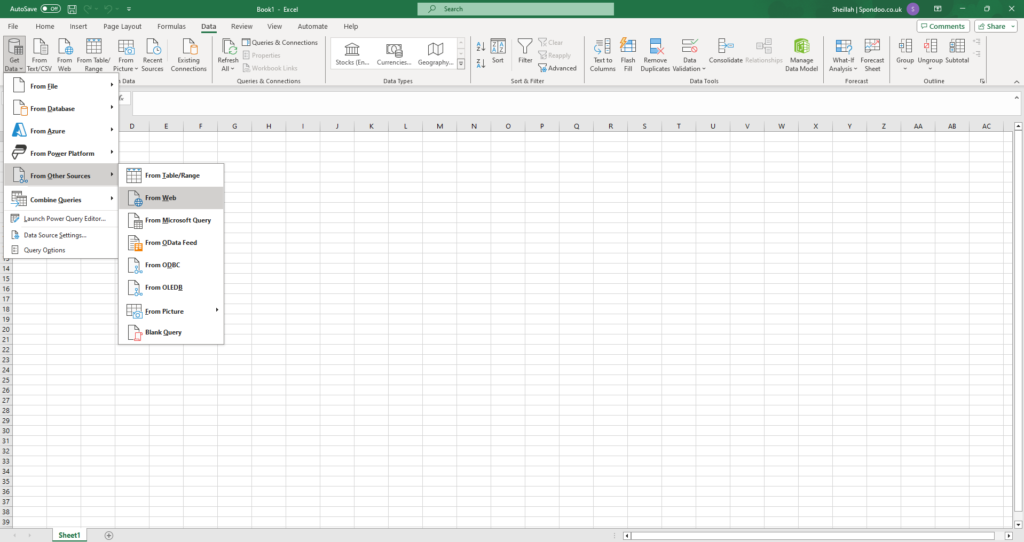
In Excel, go to the "Data" tab and under "From Other Sources", select "From Web" under the "Get Data" Section.

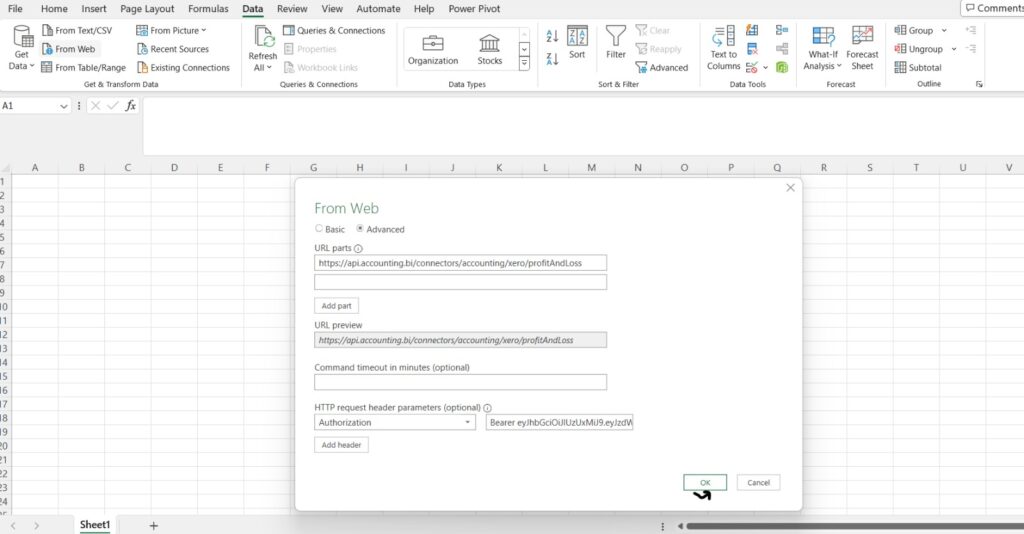
In the "HTTP request header parameters" section, in the Dialog box where it is written Enter or select a value type “Authorization” (must be the US spelling) and in the other dialog box type "Bearer", followed by a space and paste the Bearer Token (copied earlier).
(Note: To find URL Endpoints and Bearer Tokens, access the Balance Sheet and Profit and Loss reports within Accounting.bi.)
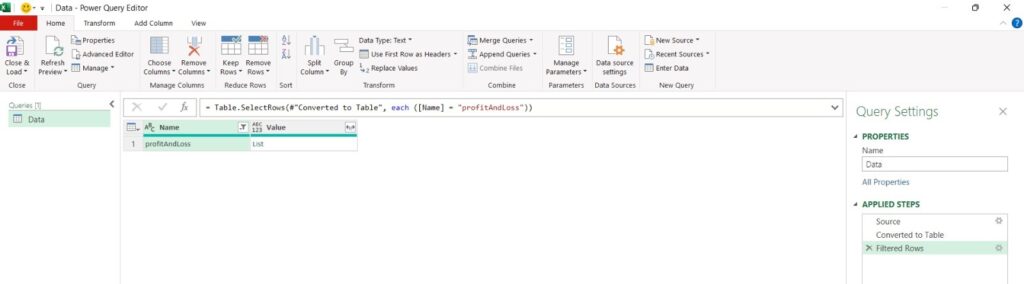
The next screen will show you the reports that you had already called from Xero through Accounting Bi.
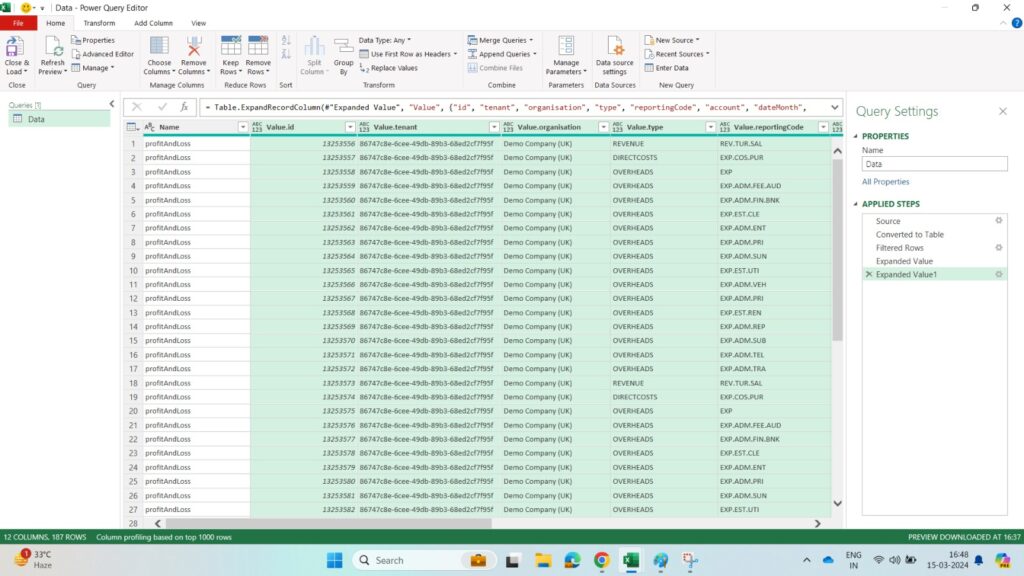
Then data will be shown in Power Query click on "Into Table" tab to convert your data into a table.
2.Expand the record by clicking on the two arrows pointing in opposite directions,
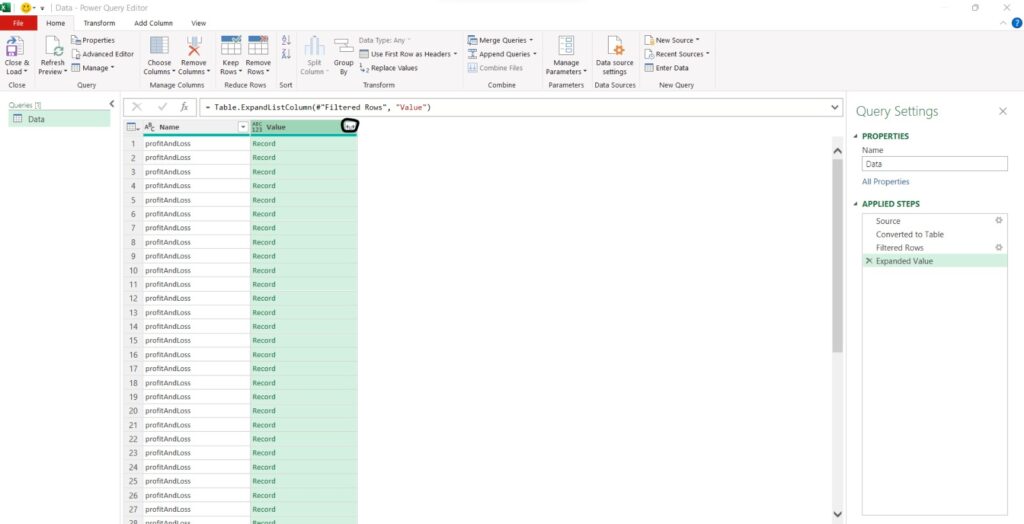
3.A table with your report data should now appear in Power Query.
b. Using Templates:
Excel templates with pre-built web connections compatible with Power Query are available at this URL: https://www.smartsheet.com/top-excel-accounting-templates
Like the add-in method, there are Excel templates with pre-built web connections compatible with Power Query.
To refresh pivot tables, go to the "Data" tab and click "Refresh All."
Please make sure to regularly refresh your reports, so that you can easily switch between the different types of reports, such as balance sheets or profit and loss statements.
Method 3: Excel Power Query (Limited Options):
Excel Power Query functionality is limited for Journals reports.
We recommend contacting us at support@accounting.bi for assistance connecting this report to your Excel.
By following these methods, you can leverage the power of AccountingBi to seamlessly connect your Xero accounting data with Microsoft Excel, enabling you to create insightful reports and streamline your financial analysis.